Start of Shift
- Turn on the scribe's lights.
- Turn on the scribe's computer.
 We recommend keeping the scribe's computer and
  Scribe3 running with Internet access at all times to ensure pending uploads can complete between shifts, and correction requests can be received as soon as possible. Keeping
  TeamViewer running as well ensures remote support/maintenance can be performed.
 - Turn on the scribe's monitor.
- Clean the scribe's glass platens with glass cleaning solution and microfiber cloth; ensure no streaks are left behind.
- If Ubuntu did not automatically login, do so with the "scribe" account and associated password.
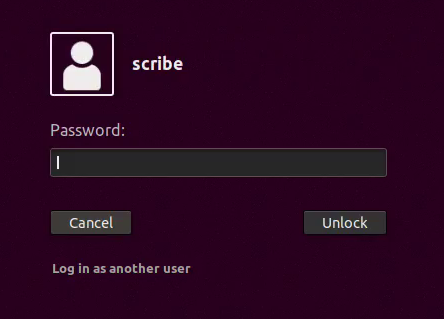
 Consult your Supervisor or ttsupport@archive.org for any login issues.
 - Scribe3 should automatically launch and be kept running at all times. If not, manually launch it from Ubuntu's dock.
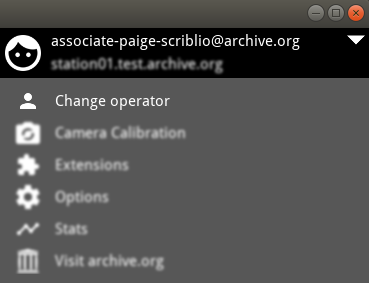
- Ensure the correct operator is logged into Scribe3, which is displayed on the User Menu at the top-right. If not, click the User Menu, then "Change operator" to login with the appropriate archive.org account.
- Remove camera lens caps.
 If "Software Updater" has presented itself with available Ubuntu updates, click "Install Now" to apply them.Alternatively, minimize Software Updater and wait until a work break or end of shift to install them, as depending on the amount and/or type of updates, their installation might degrade system performance during production.
- Obtain books for digitization.
Create Digital Item
- Select and acquire the book to be digitized.
- Using Scribe3, click
 "New Book" on the Scribe Dashboard.
 - The "Cameras are not calibrated" dialog will automatically trigger when creating the first new book, or taking the first shot for the current Scribe3 session.
 Refer to Camera Calibration for more information.
 - Otherwise, the Book Metadata form will appear.
The two most common workflows are "Local" and "Preloaded" metadata.
Local Metadata
- Focus on the left side of the metadata form:
- In the "Global Book Settings" section, select the appropriate "Collection Set" from the dropdown.If your collection is not available, or you need a new collection registered for use with your scribe, please contact ttsupport@archive.org
- If you are using a Full Frame Scribe or Foldout Scribe where camera position can vary, ensure the book "PPI" matches the current, physical setup.
- In the "Distinguishing Metadata" section, enter any required values.
- In the "Global Book Settings" section, select the appropriate "Collection Set" from the dropdown.
- Focus on the right side of the metadata form:
 Please do not manually enter an "Identifier" value; an illegal identifier will cause an error and workflow blockage. Scribe3 will generate a legal identifier later in the workflow.
- Enter the appropriate metadata into the metadata form on the right side.
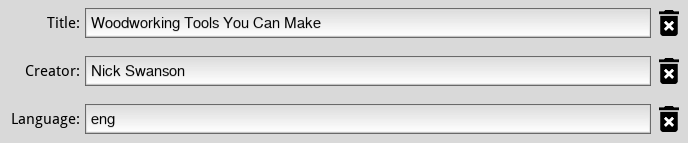 We recommend at least entering a "Title", "Creator", and "Language"."Language" must be a MARC language code. Please refer the Library of Congress list if you are unsure of the language code: https://www.loc.gov/marc/languages/language_code.html
 - To add another standard field:
- Click the
"Add Metadata Field" button at the bottom-right to trigger the "New Metadata Field" dialog. Select a "Key" from the dropdown and enter its associated value.
- Click "Ok" to save your changes.
- Click the
- To add a custom key/field:
- "Add Metadata Field" button at the bottom-right to trigger the "New Metadata Field" dialog. Select "Custom" from the "Key" dropdown, then enter the desired key.The key must be all lowercase, alphanumeric, no spaces, but _underscores are allowed.
- Enter the associated value, then click "Ok" to save your changes.
- "Add Metadata Field" button at the bottom-right to trigger the "New Metadata Field" dialog. Select "Custom" from the "Key" dropdown, then enter the desired key.
- Ensure all desired metadata is present and correct.If you cannot see your extra, standard, and custom fields, click the
"Show All Fields" button at the bottom-right.
Click "Generate" to generate an identifier for your item.
The generated identifier anatomy is [14 characters from "Title"][4 digits from "Volume"][4 characters from "Creator"]Click "Save & Done" to proceed with image capture and trigger the "Prepare first spread" dialog.
- Enter the appropriate metadata into the metadata form on the right side.
Preloaded Metadata
- Focus on the left side of the metadata form:
- If you are using a Full Frame Scribe or Foldout Scribe where camera position can vary, ensure the book "PPI" matches the current, physical setup.
- In the "Load Metadata" section, ensure the "Preloaded Identifier" radio button is selected.
 Your radio button selection will be remembered for subsequent items during the current Scribe3 session.
 - Click inside the "Load Metadata" field, input the identifier, then click
"Fetch Metadata".
Scribe3 will attempt to retrieve the item's preloaded metadata, claim the item on your behalf, then populate and lock the metadata form on the right.
- If you are using a Full Frame Scribe or Foldout Scribe where camera position can vary, ensure the book "PPI" matches the current, physical setup.
Core Image Capture Process
The following process is for a left-to-right page progression book. Please refer to our documentation on right-to-left page progression books for differences to be applied to the core process.
Please tuck in or remove tags or other protrusions. This will help the processing of your books later in the workflow.
Shoot the Book
- Starting at the "Prepare first spread" dialog: open the cradle, then place the closed book on the right cradle plate with the front cover facing up.
- If your scribe uses a standalone color card/target (as opposed to embedded in the cradle plates), place it on the left cradle plate.

- Close the cradle, then click "Shoot"; the camera(s) will trigger and capture the first
Spread.The first leaf and spread are numbered 0 instead of 1. - Open the book to the next spread, centered on the cradle plates.This generally consists of the inside front cover and its opposing page.
- Close the cradle, then take a shot of the spread.To trigger a camera shot, click the
"SHOOT" button at the bottom-right, or press the keyboard's spacebar, or press Enter/Return on the keyboard.
Press F1 or the  icon at the bottom-right of the status bar to view a list of Scribe3's keyboard shortcuts.
 - Open the cradle:
- Insert a piece of black card stock between the inside front cover's leaves.
- Insert a piece of black card stock between the inside back cover's leaves.This provides more contrast along the page edges, which will help the processing of your books later in the workflow.
- Open the book to the next spread, close the cradle, then take a shot of the spread.
- Continue to capture subsequent spreads by repeating:
- Open the cradle.
- Turn the page to reveal the next spread.
- Close the cradle.
- Take a shot of the spread.
- Remove the black card stock before shooting the inside back cover's spread.
- The last spread captured generally consists of the back cover on the left cradle plate, and the color card/target on the right cradle plate.
- Open the cradle and remove the book.
- If your cradle uses a standalone color card/target, move it to the right cradle plate.
- Remove the black card stock from between the inside front cover's leaves, then place the closed book on the left cradle plate with the back cover facing up.
- Take a shot of the spread.
- After all images have been captured, open the cradle, then remove the book.
- If your cradle uses a standalone color card/target, move it back to the left cradle plate.
- Close the cradle.
- Remove all digitization accessories/tools from the book.
- If any tags or other protrusions were tucked in or removed before digitization, return them to their original positions.
Upload the Book
Once all shots have been taken, stay on the shooting interface; the book action bar has two upload options:
 Click "Upload book to Republisher + new book" to queue the item's upload, then automatically transition to the Book Metadata screen to create a new item.
 Click "Upload book to Republisher" to queue the item's upload, then transition to the Scribe Dashboard.
Alternatively, an item can be queued for upload from the Scribe Dashboard by clicking anywhere on the item's row (except its identifier) to trigger the "Book Action Panel", then clicking "Upload".
Please be certain the book is ready for upload. If you need to export a copy of the book locally, it must be done before queuing the upload. All upload methods require confirmation. A queued upload cannot be canceled.
End of Shift
- If the scribe is shared with others, click the User Menu, then "Change operator" to encourage the next operator to login with the appropriate archive.org account.
- Replace the camera lens caps.
- If you deferred Ubuntu updates for end of shift, open "Software Updater" and click "Install Now" to apply them.
- We recommend keeping the scribe's computer and Scribe3 running with Internet access at all times to ensure pending uploads can complete between shifts, and correction requests can be received as soon as possible. Keeping TeamViewer running as well ensures remote support/maintenance can be performed.
- Turn off the scribe's lights and monitor.
Scribe Operator Tips
- Keep the book stable, in a static position in the cradle. Holding down the book with one hand while flipping the page with the other hand may be required.This will help will help the processing of your books later in the workflow.
- Ensure the cradle is fully closed before taking a shot. Early or late shooting will result in a blurry capture, requiring a reshoot.
- Periodically check the book is flush with the glass platens.
- Pay attention to audio and visual cues to maintain a rhythm for taking shots.
- The camera's shutter will click when taking a shot.
- "Silent Shooting" is enabled by default for Sony a6300+/a7rII+ cameras to increase camera longevity. To compensate, Scribe3 emits an Audio Cue to indicate the cameras have fired.
- Scribe3 has a spinning, visual indicator for each leaf when a shot is in progress. Another shot cannot be captured while they are on screen.
- The time between these cues might increase due to a temporary system slow down. You will need to dynamically alter your rhythm to avoid blurry shots.